Thursday, 7 April 2016

ROLE OF INTERFERENCE AND COLLISION DETECTION IN SPM INDUSTRIES

Special Purpose Machine (SPM) is widely used for special kind of operations, which are not economical on conventional machines. It is designed for getting higher accuracy at desired condition. A design engineer has to improve existing manufacturing technique by implanting new ideas like Special Purpose Machine (SPM). The company’s decision making is based on the motives of improving existing manufacturing processes which result in to major advantages like, reduced manufacturing lead time, tool profiling methods of processing and consistent results on a long run.

TECHNICAL CHALLENGES FACED IN SPM SECTOR
  • Unable to determine collision & interference between parts
  • Top down assembly modelling
  • To showcase physical working of machine
  • To create and validate mechanisms involved
  • Creating innovative concepts
  • Design collaboration of standard components like motor, linear guide ways, pulleys, power packs etc…
  • Design and validation of structural elements
  • Design communication and approval
These are few of the Technical challenges faced by the SPM sectors during their design process. Let us quickly have an overview on how Interference and collision detection plays major role in these sectors.

INTERFERENCE DETECTION
  • Interference Detection identifies interferences between components, and helps you to examine and evaluate those interferences.
  • Interference Detection is useful in complex assemblies, where it can be difficult to visually determine whether components interfere with each other.
  • SOLIDWORKS tools help you verify whether your designs will fit, assemble, and operate correctly before you assemble any parts. Interference checking finds issues early in design, giving you more time to make cost efficient fixtures.

 Interference Detection


BENEFITS
  • Determine the interference between components.
  • Display the true volume of interference as a shaded volume.
  • Change the display settings of the interfering and non-interfering components to see the interference better.
  • Select to ignore interferences that you want to exclude such as press fits, interferences of threaded fasteners, and so on.
  • Option to include interferences between bodies within Multibody parts.
  • Option to treat a subassembly as a single component, so that interferences between the subassembly's components are not reported.
  • Distinguish between coincidence interferences and standard interferences

COLLISION DETECTION
  • The software can detect collisions with the entire assembly or a selected group of components
  • You can find collisions for either the selected components or for all of the components in an assembly.
  • Collision Detection accelerates the design process, saving time and development costs, and increasing productivity.
 Collision Detection


BENEFITS
  • Physical Dynamics is an option in Collision Detection that allows you to see the motion of assembly components in a realistic way
  • Dynamic Clearance Verification mode - Focused on ensuring clearance at all times
  • Interference or clearance checks in either 2D or 3D
  • Stop with audible warning when collision occurs when dragging/moving a component
  • Local or global checks within a design to find all interferences

Wednesday, 23 March 2016

Check the Product Manufacturability at the Design Stage

DFM stands for Design for Manufacturing. The good Design practice is not only focusing on the Product design alone, but also its producibility or manufacturability. It is most important to detect and eliminate mistakes before the product or part goes to manufacturing.

SOLIDWORKS has an inbuilt DFM tool called DFMXpress that helps in implementing common manufacturability checks related to machining and sheet metal fabrication. It helps to avoid downstream problems early in the design stage, thereby reduces cost and minimizes time to market.


DFMXpress reduces engineering changes (ECNs & ECOs) by predicting manufacturing problems early in the upstream design stage. It ensures that the design is compatible with available or desired manufacturing process and can be manufactured economically. This allows potential problem to be fixed in the design stage which is the least expensive place to address them. The design of the component can have enormous effect on cost of manufacturing. DFMXpress plays a vital role in bringing down the manufacturing costs.

Monday, 21 March 2016

SOLIDWORKS Solutions for Piping Design

SOLIDWORKS Routing Solutions give ample set of tools for creation of Pipe, Tube and Electrical route Designs. Piping Industry deals with complex routing lines, that are difficult to be predicted and Serviced. Design of these Piping Systems is also a tedious job, for the design engineer. 

SOLIDWORKS Automates the Way of Piping Design with solutions like Auto-Routing Capabilities and Dedicated Routing Library with Reusable Components like Flanges, Fittings, Equipments and Pipes of Different standards.


Piping Solutions from Solidworks:
  • Easy to Create 3D piping system designs, just by a 3d sketch
  • Auto-route capability & Designs can be easily edited according to assembly and service needs
  • Automatically generate piping manufacturing drawings from 3D models
  • Different Connections like butt welded, socket welded, threaded, and other connections are  available
  • Calculate cut lengths for all pipe and tube runs
  • Automate placement of supports and hangers for all lines
  • Share Output PCF files to other Softwares
  • Export tubing/piping bend tables to CNC benders
  • Automatically create bill of material (BOM), cut lists, bend tables, and other manufacturing documentation
  • Access a CAD library of piping and tubing components
  • Creation of custom piping/tubing components through the Routing Library Manager wizard

Direct Model Editing through SOLIDWORKS

About

SOLIDWORKS 3D CAD software gives designers simple ways to quickly create and adjust 3D model geometry using direct model editing. Simply click on the model geometry and move it, speeding up design, saving time and development costs, and increasing productivity.

Direct Model Editing Overview

Easy-to-use direct model editing enables designers to quickly make changes to their 3D model:

  • Direct Edit Toolbar enables you to copy, move, split, replace, offset, push, and drag geometry to create the result you want.
  • Patterns instantly create SOLIDWORKS features, faces, and solid bodies with a simple click made directly on the geometry to be patterned.
  • Direct Edit capabilities automatically convert non-native, imported model geometry into intelligent SOLIDWORKS features that can be modified parametrically or through direct geometry manipulation.
  • Instant3D capabilities let you drag geometry and dimension manipulators to create and modify features.
  • Live Section capabilities can be used to dynamically section models with any plane and then drag the section outline to make a change in the 3D model. Click on the model and then you can move, copy, and rotate surfaces and solid bodies to modify geometry.

Direct Modeling

A more user-friendly approach to 3D CAD comes from 3D direct modeling. By this technology designers can perform quick and immediate models editing without knowing anything about their modeling history but simply translating and rotating faces, edges and nodes. Moreover through a direct 3D modeling system a designer can easily continue a design where others left off resulting very performing for CAD model exchange on extended design teams.

With this approach designer can create quickly and easily 3D models which can be modified through direct on-the-fly interaction with the geometry (figure 9). This methodology is called explicit modeling, and is flexible and easy to use. This approach is also called history-free and it can be more effective in the early stages of design where the designers can create highly customized products without the extra effort of up-front planning the process of modeling. 3D direct modeling can be learned in very short time and, because its approach is very similar to 2D, is quite easy for a 2D designer transfer its skill on the new technology.


Solidworks Direct Model Benefits

  • Higher accuracy.
  • Easier drawing handling.
  • Much faster to edit existing 3D models.
  • Much faster NC-preparations.
  • Good visualization tools makes it easy to explain ideas.

Tuesday, 23 February 2016

SOLIDWORKS 2016 SP 2.0

MAKE GREAT DESIGN HAPPEN

SOLIDWORKS has launched a new Service pack update of SOLIDWORKS 2016. Check out, the all new SOLIDWORKS 2016 SP 2.0


Visit the link below to explore the SP 2.0 release document.

Contact us for more info on what’s New in SOLIDWORKS 2016:
http://www.egsindia.com/solidworks-2016/index.html

Wednesday, 17 February 2016

Understanding the Role Of Assembly Visualization

Assembly Visualization
Assembly Visualization provides different ways to display and sort an assembly's components in a list and in the graphics area. If you want a more detailed look at the rebuild time of individual components, Assembly Visualization found under the Evaluate tab is the way to go. This tool allows you to look at your assembly in many different ways.


It helps to sort the list by one property at a time or create more complex sorting scenarios involving several different properties. Basic calculated numerical data such as component mass, density, and volume are available in the tool. Additionally, customized criteria can also be created which are dependent on several numerical values.

In some cases it is necessary to define non calculated properties such as Vendor or Status in the component files, those properties can also be accessed for modification and sorting. Properties from SOLIDWORKS Sustainability are also available. In the graphics area, the software applies colors to the components based on the value of the property you are sorting by. The colors helps to visualize the relative value of the property for each component.

Assembly Visualization Tab
From the Assembly Visualization tab it is easy to rank components based on the values of their custom properties, and activate a spectrum of colors that reflects the relative values of the properties for each component.


The Assembly Visualization tab  in the Feature Manager design tree panel contains a list of all components in the assembly, sorted initially by file name. There are three columns:
  • File name
  • Quantity
  • Property (initially Mass)
Rather than these default columns the user can also choose the required properties and sort the components accordingly.

Benefits Of Assembly Visualization:
  • Editing Property Values for component material and other non-calculated properties directly from the Assembly Visualization list.
  • Colorizing the Model that will help to visualize and compare the value of the sorting property for each component.
  • Assembly Visualization Tab you can rank components based on the values of their custom properties, and activate a spectrum of colors that reflects the relative values of the properties for each component.
  • Custom Column Dialog Box using custom and configuration-specific properties defined in the component files. You can create equations involving those properties, and use the results to sort components.

Wednesday, 10 February 2016

Detecting Overridden Dimension

SOLIDWORKS Design Checker


  • SolidWorks Design Checker verifies design elements such as 
  • Dimensioning Standards 
  • Fonts, Materials 
  • Sketches 
to ensure that SOLIDWORKS documents meet pre-defined design criteria


Adding SolidWorks Design Checker to SOLIDWORKS

  • Click Tools > Add-ins.
  • Select SolidWorks Design Checker , then click OK.
  • Click Tools > Design Checker.
  • Click Create a “New Standards File” 
  • Select Overridden Dimension
  • Save File as a “Standards file“ (*.swstd format)


To Check active document

  • Click Tools > Check Active Document
  • Add The (*.swstd) file to check
  • Select Check document  
  • All the “Overridden Dimension are highlighted dynamically
  • Perform the desired operation

Monday, 18 January 2016

PRODUCE DEFECT FREE PLASTIC PARTS

Introduction

SOLIDWORKS Plastics is used for both part designers and mold designers. In this blog, you can get information on how this technology can help in creating and optimizing parts, single and multi cavity and family mold layouts.

SOLIDWORKS Plastics

  • SOLIDWORKS Plastics most useful for Injection Molding setup organization.
  • Validate and visualize the melted Plastic Flow on the parts and molds.
  • Improvise the part quality by predicting manufacturing defects in the initial stages of the design.
  • Have alternate polymer material selection during the design phase using plastic simulation
  • Create variations among your plastic designs and test virtually before the manufacturing stage.


Steps involved in testing your Plastic Parts:

  1. Draft Analysis
  2. Meshing
  3. Applying Polymer (Material)
  4. Gate Location
  5. Run the Analysis
  6. Results
  7. Report Generation


SOLIDWORKS Plastics contains vast material and polymer database with multiple classification among the materials. Each and every class of material contains in built temperature curves, pressure curves etc. Gate location involves the entry point for the melted plastic flow. Multiple Gate location can also be provided based on the feasibility and complexity of the part.

Fill time Plot represents the time taken to fill the plastic component. Using this plot, we can also find whether the part gets fully filled. The cooling time based on the temperature parameters can also be analyzed and the approximate time to cool the part can be predicted in the initial validation stage. The part validation also involves the prediction of Air Traps, Sink Marks and Weld Lines. Each and every result can be exported and visualized as a document and in an animated video format.

Benefits

  • Predict and Avoid Injection molding manufacturing defects
  • To eliminate costly mold rework
  • Improve Part quality
  • Accelerate time to market

Friday, 8 January 2016

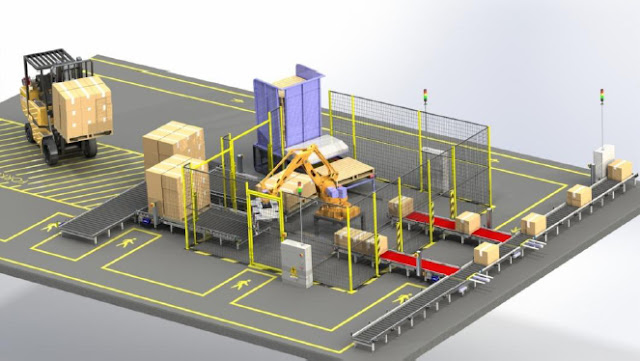
Ease your Material Handling Design with SOLIDWORKS

Challenges faced in Design of Material Handling Systems

  • Visualising Complex Designs
  • Increased design cycle time
  • Product quality and performance
  • Design reuse and configurable Designs
  • Increased Material costs & warranty costs

How to address these challenges

  • Transition from 2D to 3D and visualizing large assembly designs
  • Reduce design cycle by Automating Design Process
  • Improve product quality and performance by identifying hotspots
  • Modular Design and Design interference Checks
  • Weight reduction and load carrying capacity determination
  • Ensure reliability and safety as per standards
 EGS India | SOLIDWORKS Reseller

SOLIDWORKS Solutions in Action 

  • Solidworks Solutions boosts innovation to make Companies more profitable and more productive.
  • Solidworks Simulation stands aside Design Team to Virtually test at early stages of design process
  • Design Automation Tools like Driveworksxpress and Solidworks API improves performance and captures knowledge to be used continually.
Explore more about customization from EGS India

  • Design optimization Tool suggests alternatives to offset the material cost and Optimizes design for size, weight and efficiency
  • Eliminates errors and reduces development costs
Explore new ideas, innovative concepts and better ways of doing 
things through Solidworks Solutions.

Friday, 11 December 2015

Create Sheet Metal Swept Flanges "Hole" in a better Way

One of the best sheet metal enhancements in SOLIDWORKS 2016 is the ability to add Cut Features to a Swept Flange and have those features map correctly to the Flat Pattern. Although the Swept Flange tool is a wonderful part of the Sheet Metal toolset, I have had many users comment about how frustrated they were that they could add Cut and Hole Features to their Swept Flanges and see them in their formed views but the hole features were missing in their Flat Pattern when it was time to send the part out to the Punch Press or Laser Cutter!


SOLIDWORKS 2015 Sheet Metal Swept Flange Flat Pattern

Above is a Sheet Metal part created in SOLIDWORKS 2015, the part is made using a Swept Flange and two Cut features. You can see when the part is flattened the two Cut Features do not propagate to the Flat Pattern and disappear from the view, this would usually result in having to add the Cut Features to the Flat Pattern separately which results in a potential loss in accuracy and adding valuable time to the part design process.


SOLIDWORKS 2016 Sheet Metal Swept Flange Flat Pattern

In the SOLIDWORKS 2016 example above, you can see the same Swept Flange part but with both Cut Features being mapped correctly onto the Flat Pattern and not requiring any features to be added directly to the Flat Pattern. It is easy to see how anyone who uses the sheet metal Swept Flange often will take full advantage of this fantastic enhancement to make the creation of complex sheet metal parts quicker and easier than ever before.

For more info mail us @ lakshmipriya@egs.co.in